A tankless water heater, as the name suggests, is a type of water heater that operates without a storage tank.If you’re dealing with a leaking tankless water heater, it’s essential to address the issue promptly to prevent further damage and potential water waste. Here are some steps to help you fix a leaking tankless water heater.
But what do you do when your tankless water heater starts leaking? It might seem like a daunting task to fix it, especially if you’re not familiar with plumbing. But don’t worry, it’s not as complicated as it seems!
In this guide, we will walk you through the steps to fix a leaking tankless water heater. We’ll discuss common causes of leaks, how to identify them and provide practical solutions. With a bit of patience and the right tools, you can fix your leaking tankless water heater and ensure it continues to provide you with hot water when you need it.
Understanding Tankless Water Heaters
Before we jump into the troubleshooting process, let’s take a moment to understand tankless water heaters better. These innovative devices heat water on demand, providing a continuous supply of hot water without the need for a storage tank. While they are generally reliable and efficient, they can sometimes develop leaks.
Identifying the Type of Leak

The first step in fixing a leaking tankless water heater is to identify the type of leak you’re dealing with. Leaks can occur for various reasons, and knowing the source of the leak is essential for effective repair.
Internal Leaks
Internal leaks typically occur within the unit. They can be challenging to identify because the water often evaporates before it becomes visible. However, there are some telltale signs to watch for.
External Leaks
External leaks are easier to spot, as they result in visible water accumulation around the unit. These leaks are often caused by issues with connections, valves, or the unit itself.
Common Causes of Tankless Water Heater Leaks
Now that we’ve classified the types of leaks, let’s explore some common causes behind these leaks. Understanding what’s causing the problem is crucial for successful troubleshooting.
Loose Connections
Loose connections within the water heater system can lead to leaks. Check all the pipes, valves, and fittings for secure connections.
Damaged Components
Worn or damaged components, such as gaskets or o-rings, can cause water to leak. Identifying and replacing these parts is often the solution.
Pressure Relief Valve Issues
The pressure relief valve, an important safety feature, can sometimes malfunction, leading to leaks. We’ll show you how to check and address this issue.
Overheating
Excessive heat can cause expansion and contraction of components, potentially leading to leaks. Adjusting the temperature settings can help mitigate this problem.
Step-by-Step Solutions
Now that we’ve covered the basics, let’s move on to the step-by-step solutions for fixing a leaking tankless water heater. Depending on the type and cause of the leak, we’ll guide you through the necessary steps to resolve the issue effectively.
Turn Off the Power and Water Supply
Safety first, my friends! Before you start tinkering with your tankless water heater, it’s absolutely crucial to turn off the power supply and the water source. You don’t want any surprises or accidental scalding while you’re at it.
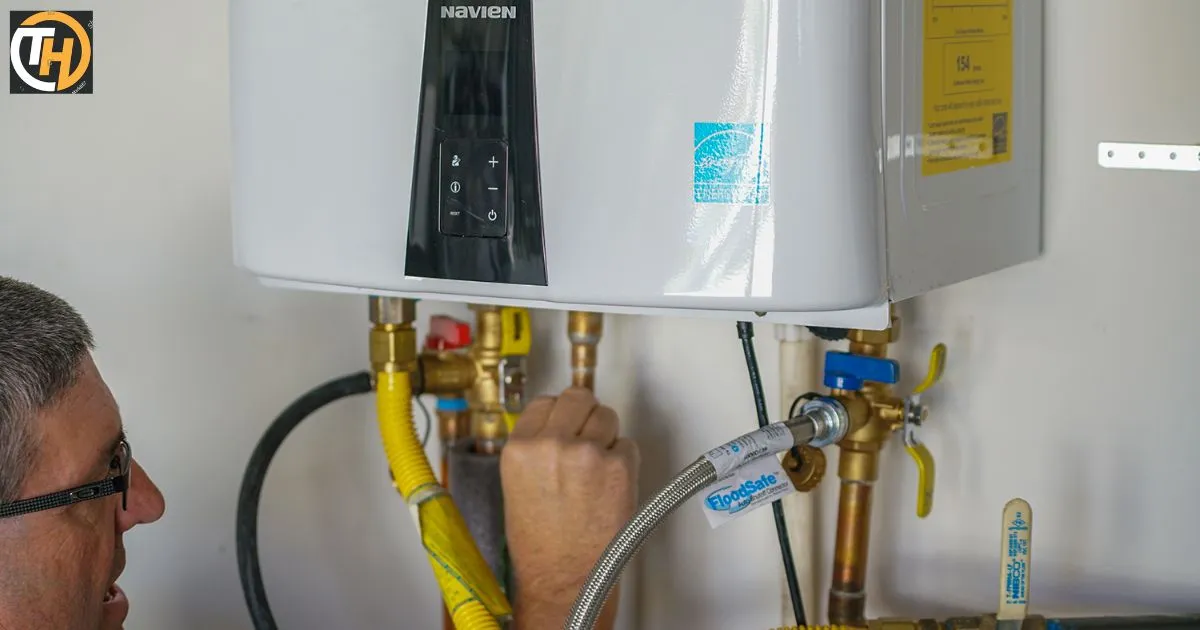
Inspect for Loose Connections
With safety boxes checked, it’s time to put on your detective hat. Carefully inspect all the connections, pipes, valves, and fittings for any signs of looseness. It’s amazing how a tiny drip can originate from a loose connection.
Check for Damaged Components
Sometimes, the culprits behind tankless water heater leaks are sneaky little things like damaged gaskets or o-rings. So, give your unit a thorough examination. If you find any of these components looking worse for wear, no worries. It’s like giving your water heater a much-needed spa day.
Test the Pressure Relief Valve
Ah, the pressure relief valve. It’s like the guardian angel of your water heater. We’ll walk you through the process of testing it to see if it’s the source of your leak. And if it is, don’t sweat it; we’ll also show you how to replace it. Think of it as replacing a worn-out tire on your car essential for a smooth ride.
Adjust the Temperature Settings

For those leaks caused by overheating, we’ve got a nifty trick up our sleeves. We’ll explain how to adjust the temperature settings on your tankless water heater. It’s like turning down the heat on a spicy chili a simple fix that can make all the difference.
How Do I Prevent This
Preventing tankless water heater leaks is all about regular maintenance and careful use. Here’s how to keep those leaks at bay:
Regular Maintenance
Schedule routine maintenance to inspect and tighten connections, replace damaged components, and ensure that the pressure relief valve is working correctly.
Temperature Management
Avoid overheating by setting the water heater to a safe temperature. This not only prevents leaks but also saves energy.
Flushing the System
Flushing your tankless water heater periodically can help remove sediment and mineral buildup that can lead to leaks. Follow the manufacturer’s recommendations for flushing.
Check the Pressure Relief Valve
Test the pressure relief valve periodically to ensure it’s functioning as it should. Replace it if necessary.
Keep the Area Clear
Ensure that the area around your tankless water heater is free from debris and obstacles. Proper ventilation and drainage are essential for preventing condensate leaks
Understand the T&P Valve
Before you do anything, it’s essential to understand what the T&P valve does. This knowledge will help you identify issues and address them effectively.
Check for Leaks
If you notice water dripping from the T&P valve, it’s a sign that something is amiss. First, make sure the water isn’t coming from a nearby pipe or connection. If the valve itself is leaking, it could be due to several reasons.
Test the Valve
Testing the T&P valve is a straightforward procedure. You need a bucket, a hose, and some gloves. Follow these steps:
- Place the bucket under the T&P valve to catch the water.
- Put on your gloves, just to be safe.
- Carefully lift the valve’s lever for a few seconds, allowing water to flow into the bucket.
- Release the lever. The water flow should stop.
If the water continues to flow or the valve doesn’t reseal properly, it’s time to replace the T&P valve.
Replacing the T&P Valve
If you’ve determined that the T&P valve is faulty or not working correctly, it’s essential to replace it. Here’s how:
- Turn off the power and water supply to the water heater.
- Attach a hose to the T&P valve.
- Place the other end of the hose into a bucket or drain.
- Open the valve’s lever to release any pressure and drain water from the tank.
- Once the water has drained, remove the old T&P valve.
- Wrap the threads of the new valve with the plumber’s tape.
- Install the new valve and tighten it securely.
- Turn on the water supply and power.
- Check for any leaks around the new valve.
Adjusting the Pressure
In some cases, the T&P valve might be releasing water because the pressure in your tankless water heater is too high. To address this, follow these steps:
- Turn off the power and water supply to the water heater.
- Locate the pressure adjustment screw or knob on the valve.
- Using a screwdriver or pliers, adjust the pressure to the recommended level. Check your water heater’s manual for the right pressure setting.
- Turn the water supply and power back on.
- Monitor the T&P valve for any further leaks.
Remember that the T&P valve is a vital safety component. If you’re unsure about any of the steps or if the problem persists, it’s always a good idea to consult a professional plumber or HVAC technician.
Table summarizing the key points from the article “How To Fix A Leaking Tankless Water Heater”
| Section | Key Points |
| Introduction | Leaking tankless water heaters can lead to water damage and should be addressed promptly. |
| DIY repair is possible with proper guidance. | |
| Safety First | Turn off the power and water supply to ensure safety during the repair. |
| Gather the necessary tools and materials before starting the repair. | |
| Identifying the Culprit | Common sources of leaks include loose connections, damaged components, overheating, and pressure relief valve issues. |
| Fixing the Leak | Determine your repair capabilities, whether you can DIY or require professional help. |
| Steps for fixing the leak: | |
| Shut off the water supply and drain the heater. | |
| Inspect and tighten loose connections. | |
| Replace damaged components like gaskets or o-rings. | |
| Test the pressure relief valve and replace if necessary. | |
| Adjust temperature settings if overheating is the issue. | |
| Maintenance Tips | Prevent future leaks through regular maintenance and temperature management. |
| When to Call a Professional | Recognize when it’s best to call a professional plumber, especially for complex issues. |
| Tips for selecting the right plumber for the job. | |
| Frequently Asked Questions | Answer common questions about tankless water heater leaks, Teflon tape use, and maintenance frequency. |
| Conclusion | Stress the importance of safety and regular maintenance to ensure a leak-free water heater. |
| Encourage readers to approach the challenge with confidence. |
This expanded summary provides a more detailed overview of the main points covered in the full article
FAQs
How do you stop a tankless water heater from leaking?
To stop a tankless water heater from leaking, first turn off the power and water supply, then identify the source of the leak and perform the necessary repairs or maintenance.
Why is my state tankless water heater leaking from the bottom?
If your state tankless water heater is leaking from the bottom, it could be due to a damaged or faulty pressure relief valve, loose connections, or condensate issues.
Can a leaking water heater be fixed?
Yes, a leaking water heater can often be fixed. The repair process depends on the source of the leak, and it may involve tightening connections, replacing faulty components, or addressing issues with the pressure relief valve.
Why is my tankless water heater relief valve leaking?
A tankless water heater relief valve may leak due to excessive pressure, overheating, or a faulty valve. Regular maintenance and proper adjustment can help prevent this issue.
Where does the tankless water heater leak from?
Tankless water heaters can leak from various sources, including loose connections, damaged internal components, pressure relief valves, condensate drains, and heat exchangers. Identifying the source is key to addressing the problem.
Conclusion
Wrapping it up, and fixing a leaking tankless water heater may seem daunting, but it’s a challenge anyone can tackle with the right guidance. Remember, safety first, and take the time to identify the source of the leak. You’ve now got the tools to handle the most common issues, whether it’s a loose connection, a pesky relief valve, or even a finicky heat exchanger.
Don’t forget the importance of regular maintenance to keep future leaks at bay. And when in doubt, know when to call in a professional. With these skills under your belt, you can turn that drip into a distant memory and enjoy a dry, worry-free home. Happy fixing!