When it comes to the maintenance of your water heater, one essential task is draining it to remove sediment buildup. Draining your water heater helps maintain its efficiency and prolong its lifespan. However, not all water heaters have the convenience of a floor drain, which can make this task seem challenging.
If you find yourself wondering how to drain a water heater with no floor drain, worry not we’ve got you covered. In this guide, we will take you through the step-by-step process of safely and efficiently drain a water heater with no floor drain, even if you don’t have a floor drain. By following these instructions, you can ensure that your water heater continues to provide you with hot water reliably.
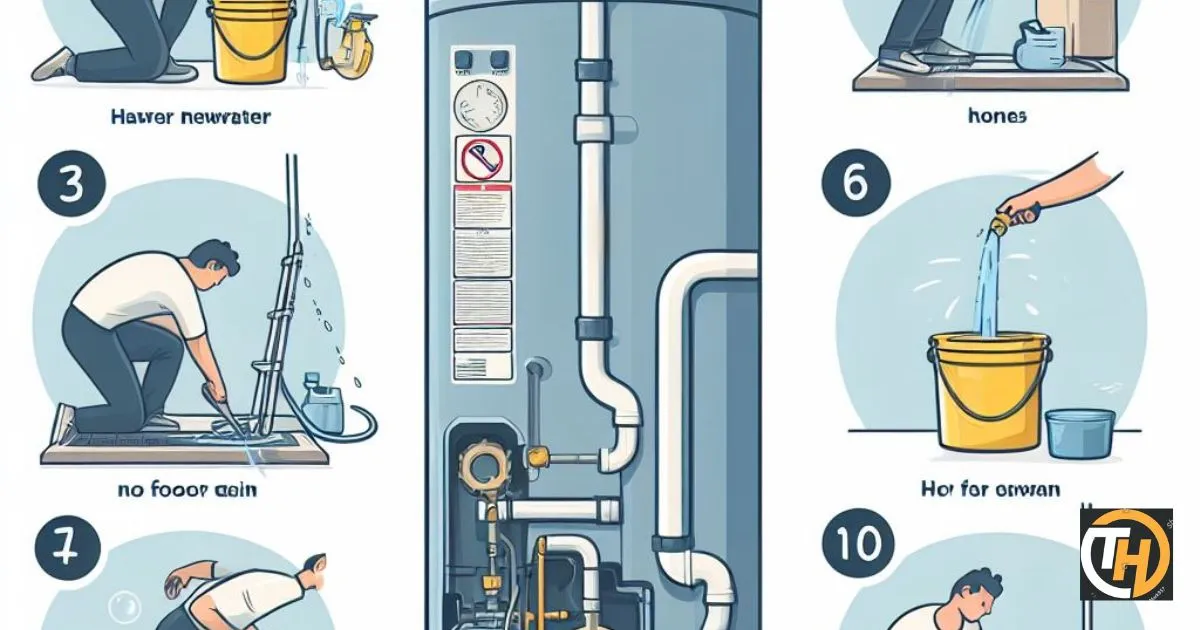
If you’re in a situation where you need to drain a water heater but don’t have a floor drain, don’t worry. These steps will guide you through the process:
Follow These Steps
1. Gather Necessary Tools and Materials
Before you begin the process of draining your water heater, it’s essential to gather all the required tools and materials. Having the right equipment on hand will make the task more efficient and ensure you can complete it smoothly. Here’s what you’ll need:
- A hose
- A sump pump
- A bucket
- Adjustable wrenches
- Teflon tape
- Gloves
2. Turn Off the Power
Before you embark on the process of draining your water heater without a floor drain, it’s crucial to turn off the power to the appliance. This is a safety measure that prevents accidents and potential damage. Ensure that the electricity or gas supply to your water heater is completely deactivated.
3. Shut Off the Water Supply
Firstly, locate the cold water supply valve that feeds into your water heater and promptly shut it off. This step is essential as it stops the inflow of water into the tank. By turning off the water supply, you create the conditions needed to drain the water heater effectively.
4. Attach a Hose
To facilitate the draining process of your water heater without a floor drain, you’ll need to connect a hose. One end of the hose should be securely attached to the drain valve of the water heater.
Position the other end in a way that allows the discharged water to flow towards a suitable drainage spot. The hose functions as a channel for the water that is being taken out of the tank, ensuring that it goes to the intended location.
5. Position the Sump Pump
For effective water draining when your water heater lacks a floor drain, you’ll need a sump pump. Place the sump pump in a location that allows it to pump out the discharged water safely. Ensure it’s stable and well-positioned to prevent any mishaps during the draining process.
The sump pump is crucial for efficiently removing water from the tank, so its placement is essential for a successful water heater draining operation.
6. Open the Pressure Relief Valve
Before initiating the water heater draining process, it’s important to open the pressure relief valve. This step helps facilitate the draining process by allowing air to enter the tank, preventing any vacuum formation that can hinder the flow of water. Make sure to carefully open the pressure relief valve to ensure a smooth and efficient draining operation.
7. Start Pumping
Once you’ve properly set up the sump pump and connected the hose, it’s time to initiate the draining process. Turn on the sump pump to begin pumping out the water from your water heater.
Ensure that the hose connected to the pump leads to a suitable drainage location where the expelled water won’t cause any issues. This step is crucial in removing the water efficiently and effectively.
8. Monitor the Progress
While the sump pump is actively draining the water heater, it’s essential to keep a close eye on the process. Regularly check to ensure that the water is being removed smoothly and efficiently.
This monitoring allows you to identify and address any potential issues or obstructions in the draining system promptly. It also ensures that the water heater is emptied as expected, preparing it for further maintenance.
9. Refill and Flush
nce the water heater is fully drained and you’ve ensured that no more water is exiting, it’s time to begin the refilling and flushing process. Here’s how to do it:
- Close the drain valve: Shut off the drain valve to prevent any remaining water from escaping.
- Remove the hose: Disconnect the hose from the drain valve.
- Turn on the cold water supply: Open the cold water supply valve to allow fresh water to fill the tank. Be cautious as the water will be cold.
- Wait for the tank to fill: Let the tank fill with water until it’s full.
- Flush the ta nk: To remove any remaining sediment or debris, open the hot water tap at a sink or faucet in your home. This allows the water to flow through the system and flush out any impurities. You may notice some sputtering initially this is normal.
- Close the tap: Once the water runs clear and there are no more sputtering sounds, close the hot water tap.
- Turn off the power: Finally, restore power to the water heater to bring it back to its regular operating mode.
Refilling and flushing your water heater helps maintain its efficiency and prolong its lifespan. It ensures that the heating element functions optimally and that sediment buildup is minimized, reducing the risk of damage.
10. Safety First
Throughout the process of draining your water heater, it’s crucial to prioritize safety to prevent accidents and ensure a smooth operation. Here are some essential safety tips:
Use Gloves

When handling the water heater and the hose, it’s important to wear protective gloves to shield your hands from hot surfaces and scalding water.
Handle Hot Water with Care
Be cautious when draining the water heater, as the water can be extremely hot. Avoid any contact with the hot water to prevent burns.
Secure the Power
Before starting the draining process, make sure to turn off the power to the water heater. This prevents any electrical accidents during the procedure.
Choose a Suitable Location
Position the sump pump in a safe and convenient location where it can efficiently pump out the water. Ensure it’s stable and won’t tip over during operation.
Monitor the Process
Keep a close eye on the draining process to ensure it’s going smoothly. Check the hose, pump, and connections regularly for any signs of malfunction.Ensure it’s stable and won’t tip over during operation.
Stay Clear of Electrical Outlets
If you face any problems, such as a “water heater is leak,” it’s best to turn off the power supply and water and seek professional assistance to address the issue.
Prepare for Sputtering
When refilling and flushing the tank, expect some sputtering and noise as air is displaced. Keep your face and body away from the hot water during this phase.
By following these safety guidelines, you can successfully drain your water heater without any mishaps and with confidence in the process.
Here’s an informative table to help you understand the key points of the article on “How to Drain a Water Heater with No Floor Drain”:
| Section | Key Points |
| Introduction | Overview of the task and its importance |
| 1. Gather Tools | List of necessary tools and materials |
| 2. Turn Off Power | Importance of powering off the water heater |
| 3. Shut Off Water | How to locate and turn off the water supply |
| 4. Attach a Hose | Steps to connect a hose for draining |
| 5. Position Pump | Where to place the sump pump safely |
| 6. Open Relief Valve | Importance of opening the pressure relief valve |
| 7. Start Pumping | Steps to start pumping water out |
| 8. Monitor Progress | Importance of keeping an eye on the process |
| 9. Refill and Flush | How to refill the tank and flush it out |
| 10. Safety First | Emphasis on safety during the procedure |
| Conclusion | Recap and final thoughts on the process |
| FAQs | Answers to common questions after draining |
This table summarizes the main sections and key points of the article for easy reference.
FAQ
Is it necessary to drain a water heater without a floor drain?
Yes, draining your water heater is essential to maintain its efficiency and prolong its lifespan. This task helps remove sediment buildup and ensures the heater works optimally.
How often should I drain my water heater?
If you face any problems, such as a “water heater is leak,” it’s best to turn off the power supply and water and seek professional assistance to address the issue.
What should I do if I encounter any issues during the draining process?
If you face any problems, such as a “water heater is leak,” it’s best to turn off the power supply and water and seek professional assistance to address the issue.
Conclusion
Draining a water heater without a floor drain may seem challenging, but it’s a manageable task with the right tools and proper safety measures. Regular maintenance, like flushing your water heater, contributes to its longevity and ensures a steady supply of hot water in your home. Now, you’re equipped with the knowledge to keep your water heater running efficiently.