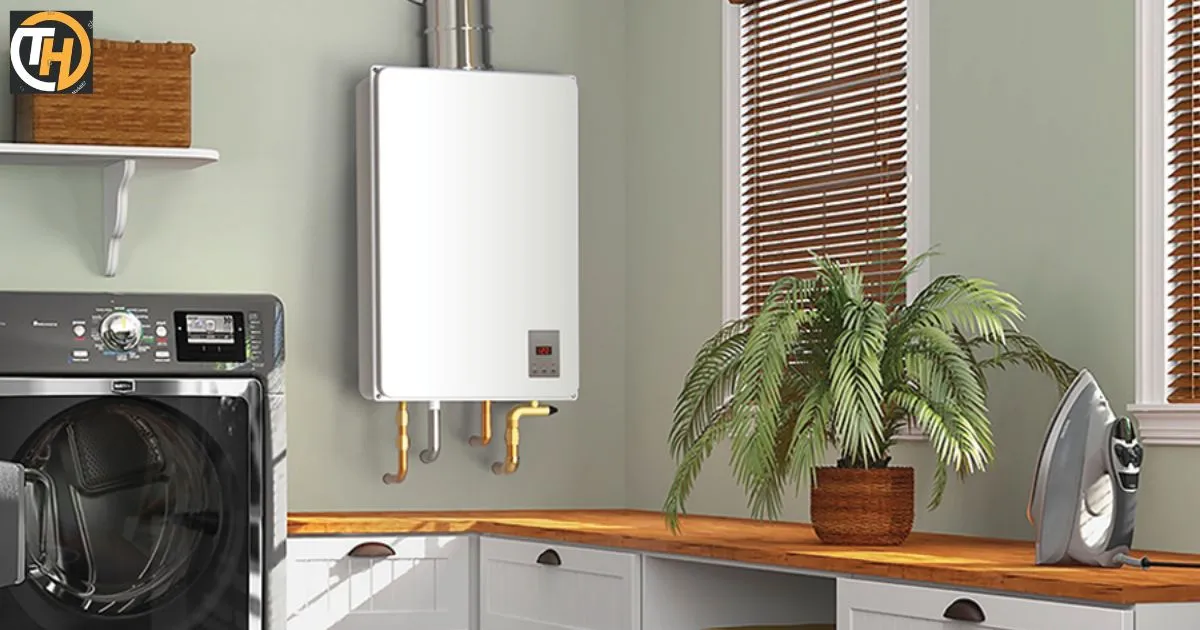
In the realm of home water heating, innovation has brought us a remarkable advancement—the tankless water heater. Unlike traditional water heaters that maintain a large tank of hot water, tankless units heat water only when you need it. The result? On-demand, energy-efficient, and endless hot water. When you choose to install a tankless water heater, it ensures you have the hot water you need, exactly when you need it.
Imagine a morning ritual where your shower is as invigorating as you desire, and the never-ending dishes in the kitchen sink never wait for hot water. With a tankless water heater, such scenarios become a daily reality. This revolutionary piece of home technology has redefined water heating, offering benefits that extend far beyond convenience.
Tankless water heaters go by various names demand water heaters, instantaneous water heaters, or continuous flow water heaters, but they all share one common goal: to provide a constant supply of hot water while minimizing energy consumption.
Choosing the Right Location
Proximity to Utility Connections
When selecting the optimal location for your tankless water heater, consider its proximity to gas and water lines. Having these utilities nearby streamlines the installation process and ensures that your tankless unit operates efficiently.
Ensuring Adequate
Ventilation Proper ventilation is essential, particularly for gas-powered tankless water heaters. These units produce exhaust gases that need safe discharge. Make sure the chosen location allows for the installation of venting systems that adhere to local building codes and safety standards.
Assessing Available
Wall Space An often overlooked consideration is the available wall space for mounting your tankless water heater. These units should be securely attached to a load-bearing wall, and the chosen location should provide easy access for maintenance.
Gathering the Necessary Tools and Materials

Before embarking on the tankless water heater installation process, it’s crucial to assemble all the essential tools and materials. Having everything you need at your fingertips will make the installation smoother and more efficient, saving you time and potential headaches. Below is a comprehensive list of the tools and materials you’ll need:
- Tools:
- Pipe wrench
- Adjustable wrench
- Screwdrivers (both flathead and Phillips)
- Pipe cutter or hacksaw
- Level
- Tape measure
- Drill and appropriate bits
- Teflon tape or pipe thread sealant
- Adjustable pliers
- Voltage tester
- Holesaw (for venting)
- Stud finder
- Plumber’s tape
Materials:
- Tankless water heater unit
- Wall-mounting brackets and hardware
- Venting kit (for gas units)
- Gas shut-off valve and supply line (for gas units)
- Coldwater and hot water shut-off valves
- Flex connectors (for water lines)
- Copper or PEX tubing (for water lines)
- Venting pipe and fittings (for gas units)
- Electrical wire and connectors (for electric units)
- Appropriate fasteners and anchors (for wall mounting)
- Pipe insulation
- Pipe straps or hangers
- Sealant or caulk (for sealing penetrations)
- Vent cap (for gas units)
- Condensation drain tube (for gas units)
By ensuring you have all these tools and materials ready, you’ll be well-prepared to carry out the installation effectively and with confidence.
Shutting Off the Power and Water Supply

Prior to installation, it’s essential to turn off the power and water supply to the old water heater or the designated area. Before you begin installing your new tankless water heater, a crucial step is to ensure the power and water supply to the old water heater or the designated area is switched off. This is a fundamental safety measure that prevents any mishaps during the installation process.
Removing the Old Water Heater (If Applicable)
Here’s a step-by-step guide on safely and efficiently removing the old water heater:
Turn Off Utilities
Begin by turning off the power supply to the water heater at the circuit breaker or fuse box. For gas water heaters, turn off the gas supply. Next, shut off the water supply to the old water heater by closing the cold water inlet and hot water outlet valves.
Drain the Tank
To prevent any water spillage during removal, it’s crucial to drain the old water heater. Connect a garden hose to the drain valve at the bottom of the tank and run the hose to a suitable drainage location, like a floor drain or outside. Open the valve and let the tank empty completely.
Disconnect Plumbing Connections
Use a pipe wrench or pliers to disconnect the water pipes from the water heater. Be prepared for some water to spill during this step.
Disconnect Gas Line(If Applicable)
If your old water heater is gas-powered, carefully disconnect the gas line. You may need to use a pipe wrench for this task. Ensure the gas line is securely turned off to avoid any gas leaks.
Remove the Old Water Heater
Once all connections are disconnected, you can now remove the old water heater. This may require some physical effort, as water heaters can be heavy. Enlist the help of a friend if needed to safely carry the unit out of the installation area.
By following these steps, you’ll be able to remove your old water heater and prepare the space for the installation of your new tankless water heater.
Installing the New Tankless Water Heater

The installation of your new tankless water heater. This step-by-step guide will ensure a smooth and hassle-free setup:
Positioning the Heater
Choose the designated location for your tankless water heater. Ensure it complies with the manufacturer’s installation guidelines, especially regarding clearances and ventilation. Wall-mounted units should be securely fastened to the wall with appropriate brackets.
Connecting Water Lines
Attach the hot and cold water supply lines to the water heater. Use appropriate fittings and ensure they are tightened securely. A union or flexible hose connector can make this step more manageable.
Gas Connection (If Gas-Powered)
If your tankless water heater operates on gas, connect the gas line to the unit. Ensure that all connections are gas-tight, and there are no leaks.
Ventilation
Proper ventilation is crucial to allow exhaust gases to exit safely. Follow the manufacturer’s instructions to install the venting system. This may involve horizontal or vertical venting depending on your unit and location.
Electrical Connections (If Electric Unit)
For electric tankless water heaters, make the necessary electrical connections. Ensure you follow the electrical code and safety guidelines to prevent electrical hazards.
Install Isolation Valves
Installing isolation valves on the hot and cold water lines will allow you to service or disconnect the water heater without affecting your entire water supply.
Testing
Once all connections are in place, turn on the water supply and gas or power. Check for any leaks at the connections and fix them if necessary. Make sure there’s proper water flow through the unit.
Setting the Temperature
Adjust the temperature settings to your desired level, following the manufacturer’s recommendations. Many tankless water heaters have digital displays for easy temperature control.
Connecting the Water and Gas Lines
Ensuring a seamless installation of your tankless water heater involves the correct connection of both the water and gas lines. Here, we will guide you through this essential process to guarantee a proper water supply and efficient heating.
Water Line Connection
Begin by connecting the water supply lines to your tankless water heater. Attach the cold water supply to the designated inlet on the unit and the hot water output to the corresponding outlet. Use appropriate fittings and ensure they are securely fastened to prevent leaks.
Isolation Valves
To enhance the functionality of your water heater and simplify future maintenance, consider installing isolation valves on both the hot and cold water lines. These valves allow you to isolate the water heater without affecting the entire water supply, making servicing and repairs more convenient.
Gas Line Connection
If your tankless water heater is gas-powered, connecting the gas line is the next crucial step. Securely attach the gas line to the unit, ensuring that all connections are gas-tight. Pay meticulous attention to this step to avoid gas leaks, which can be dangerous.
Checking for Leaks
After connecting both the water and gas lines, it’s vital to conduct a thorough check for any leaks. Turn on the water and gas supply and carefully inspect all connection points. If you detect any leaks, immediately turn off the water and gas, and address the issue by tightening fittings or making necessary adjustments.
Pressure Testing (Optional)
While not mandatory, pressure testing can provide an additional layer of security against potential leaks. By pressurizing the system with air or water, you can detect any hidden leaks that might not be immediately visible. This step can offer peace of mind and ensure the safety and efficiency of your water heater.
Venting and Exhaust System Installation

Proper venting ensures that combustion gases are safely expelled and that your tankless water heater operates efficiently.
Selecting Venting Material
The first step in the venting process is selecting the appropriate venting material. You can choose from different options, such as PVC, stainless steel, or aluminum, depending on your local building codes and the specific requirements of your tankless water heater model.
Venting Configuration
Next, determine the venting configuration that suits your installation. Common configurations include concentric venting, where both the exhaust and intake vents share a single pipe, and two-pipe systems, where separate pipes are used for exhaust and intake.
Venting Design and Sizing
Carefully plan the design and sizing of the venting system to ensure efficient gas combustion and proper ventilation. Follow the manufacturer’s guidelines regarding vent diameter and length, as this can significantly impact the heater’s performance.
Vent Termination
Determine the appropriate location for vent termination. This is where exhaust gases exit the building. Vent termination must adhere to local building codes and safety standards to prevent hazards and ensure proper ventilation.
Installation and Sealing
Carefully install the selected venting material, ensuring that all joints and connections are securely sealed. Proper sealing is essential to prevent any leaks of exhaust gases or combustion air.
Vent Insulation (If Necessary)
Depending on your climate and local building codes, you might need to insulate the venting system to prevent issues like freezing or condensation. Follow insulation guidelines provided by the heater manufacturer and any local regulations.
Inspection and Testing
After the venting system is in place, conduct a thorough inspection of all components, ensuring that they are correctly installed and sealed. Perform a functional test to confirm that exhaust gases are expelled efficiently and safely.
Electrical Connections (For Electric Tankless Heaters)
If you’ve chosen an electric tankless water heater, this section will guide you through the necessary electrical connections.
Electrical Requirements
Understand your electric tankless water heater’s electrical needs, considering factors like voltage, amperage, and circuit breaker size. Refer to the manufacturer’s guidelines for precise requirements.
Turn Off Power
Prioritize safety by switching off the power source in the installation area. This crucial step prevents electrical accidents. You can either deactivate the dedicated circuit breaker or unplug the unit.
Locate Electrical Panel
Find your home’s electrical or service entrance panel, the connection point for your tankless water heater. Ensure there’s space for an additional circuit breaker if necessary.
Install Dedicated Circuit
Electric tankless water heaters often require a dedicated circuit. This entails installing a new circuit breaker in your electrical panel tailored to the heater’s electrical needs.
Wiring and Connections
Consult the manufacturer’s instructions to correctly wire your electric tankless water heater. This typically involves connecting wires from the unit to the dedicated circuit breaker. Ensure secure connections and adhere to local electrical codes.
Grounding
Safety hinges on proper grounding. This entails connecting a ground wire to the unit and the grounding bar in your electrical panel to prevent electrical shocks and hazards.
Double-Check Connections
Prior to restoring power, meticulously review all electrical connections. Confirm their security and correct configuration, as loose connections or wiring errors can lead to malfunctions or safety concerns.
Power Restoration
After validating the electrical connections, you can restore power. For electric tankless water heaters, this typically entails reactivating the dedicated circuit breaker.
Functional Test
After power restoration, conduct a functional test by running hot water from a faucet. This verifies the unit’s efficient and consistent water heating capabilities.
Checking for Leaks
Ensuring the safety of your tankless water heater installation involves a comprehensive check for gas or water leaks. This section provides a step-by-step guide to performing this crucial task, preventing potential hazards or damage.
Flushing the System
To keep your tankless water heater in peak condition, it’s crucial to regularly flush the system. Flushing helps prevent mineral buildup, scale, and sediment from accumulating in the unit, which can lead to reduced efficiency and potential damage. This section will provide you with a comprehensive guide on how to flush your tankless water heater properly, ensuring it continues to deliver hot water efficiently and extends its lifespan.
Turning On the Power
After completing the installation and flushing process, it’s time to restore power to your tankless water heater. Subsequently, this section will guide you through the steps to safely turn the power back on, ensuring your unit is ready to provide hot water on demand.
Testing the Heater
Following the installation and flushing of your tankless water heater, it’s crucial to test the unit to ensure it’s functioning correctly. This section provides a step-by-step guide on how to test your tankless water heater to ensure it’s ready to provide hot water as expected.
Safety Tips
Ensuring the safe and efficient operation of your tankless water heater is of utmost importance. In this section, we’ll share vital safety tips to help you maintain your unit and prevent potential issues.
here’s a summary table that includes key points and descriptions from the article:
| Key Points | Description |
| Introduction | The significance of installing a tankless water heater. |
| Choosing the Right Location | Factors to consider when selecting the ideal installation location. |
| Gathering Tools and Materials | The essential tools and materials required for the installation process. |
| Shutting Off Power and Water | The importance of turning off power and water supply for safety. |
| Removing the Old Water Heater | Steps to remove an old water heater if you’re replacing one. |
| Installing the New Water Heater | A step-by-step guide for installing the new tankless water heater. |
| Connecting Water and Gas Lines | Instructions for connecting water and gas lines effectively. |
| Venting and Exhaust System Installation | Setting up the venting and exhaust system correctly. |
| Electrical Connections (For Electric Heaters) | The steps to ensure proper electrical connections for electric tankless water heaters. |
| Checking for Leaks | The necessity of checking for gas or water leaks post-installation. |
| Flushing the System | The importance of flushing the system for longevity and efficiency. |
| Turning On the Power | Safely restoring power to the tankless water heater. |
| Testing the Heater | The testing process to ensure the unit is functioning correctly. |
| Safety Tips | Essential safety tips to maintain the smooth operation of the tankless water heater. |
| Conclusion | A summary of the benefits of DIY tankless water heater installation. |
This table provides an overview of the main sections and their key highlights from the article.
FAQs
Q: Can you install a tankless water heater yourself?
A: Tankless water heaters can be self-installed, but it’s recommended to hire a professional for safety and efficiency.
Q: Are tankless water heaters installed inside or outside?
A: Tankless water heaters can be installed both inside and outside, depending on the model and climate.
Q: Is it difficult to install an electric tankless water heater?
A: Electric tankless water heaters are generally easier to install compared to gas models, but professional installation is still recommended.
Q: Are tankless water heaters easier to install?
A: Tankless water heaters can be easier to install than traditional tank-style heaters due to their compact size and flexibility.
Conclusion
In conclusion, installing a tankless water heater can be a rewarding DIY project, providing you with endless hot water and energy savings. Follow our step-by-step guide for a successful installation.
It not only grants you access to a continuous supply of hot water but also contributes to energy savings. By diligently following our comprehensive step-by-step guide, you’ll pave the way for a successful and efficient installation. So, go ahead and enjoy the benefits of endless hot water while reducing your environmental footprint.